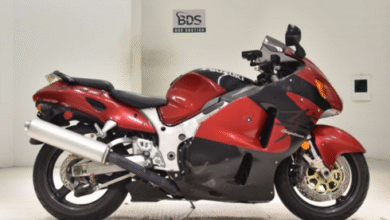
Installing frame sliders on a Ninja 400 motorcycle is a smart modification to help protect the bike’s frame and components in the event of a tip-over or low-speed crash. Here’s a general guide on how to install frame sliders on a Ninja 400:
Materials You’ll Need:
- Frame sliders kit (compatible with the Ninja 400)
- Socket set and wrenches
- Allen wrenches
- Threadlocker (optional)
- Torque wrench (recommended)
- Loctite or similar thread locker (optional)
- Motorcycle stand or paddock stand (optional but helpful)
Steps:
- Safety Precautions:
- Ensure that the motorcycle is on a stable surface and that the engine is off. If you have a motorcycle stand or paddock stand, it can be helpful to raise the bike to a more comfortable working height.
- Locate Mounting Points:
- Identify the mounting points on the motorcycle where the frame sliders will be installed. These points are typically on the frame, near the engine and fairings. Refer to the instructions provided with your frame sliders for exact locations.
- Prepare the Motorcycle:
- If necessary, remove any fairings or bodywork that obstructs access to the mounting points. Use an Allen wrench or socket set to remove the bolts securing the fairings.
- Mount the Frame Sliders:
- Each frame slider should consist of a slider puck and a mounting bracket. Attach the mounting bracket to the designated mounting point on the motorcycle frame using the provided hardware (usually bolts and washers).
- Tighten Securely:
- Use the appropriate socket or wrench to tighten the mounting bolts securely. Pay attention to the recommended torque specifications in the instructions, and consider using a torque wrench to achieve the correct tightness. Be careful not to over-torque and damage the frame.
- Attach the Slider Pucks:
- Slide the slider puck onto the mounting bracket. It should fit snugly. Use any provided hardware to secure the slider puck to the mounting bracket. Again, follow torque specifications if provided.
- Check Clearance:
- Ensure that the frame sliders do not interfere with the operation of any moving parts or the motorcycle’s lean angle. Test the handlebars and front wheel to confirm that they have full range of motion.
- Repeat for Other Side:
- If your frame slider kit includes sliders for both sides of the motorcycle, repeat the installation process on the opposite side.
- Reinstall Fairings (if removed):
- If you removed any fairings or bodywork, reattach them securely. Make sure that all bolts and fasteners are tightened to their specified torque settings.
- Final Inspection:
- Double-check all the frame slider mounting points, bolts, and pucks to ensure they are properly installed and secure.
- Test Fit:
- Gently roll the motorcycle to test the frame sliders’ clearance and functionality. Ensure that the bike’s steering and handling are not compromised.
- Optional: Apply Threadlocker (Loctite):
- Some riders choose to apply a thread locker (like Loctite) to the frame slider bolts to prevent them from coming loose over time. If you decide to use threadlocker, follow the manufacturer’s instructions.
Installing frame sliders on your Ninja 400 can provide valuable protection for your bike in case of a fall or low-speed accident. Always refer to the specific instructions provided with your frame slider kit, as the installation process may vary slightly depending on the brand and model.
Also Read:
https://infusionpost.com/how-to-install-a-southern-home-security-system/
https://infusionpost.com/how-to-install-a-strip-pole-at-home/
https://infusionpost.com/how-to-install-a-window-in-a-trailer/
https://infusionpost.com/how-to-install-aluminum-pan-roof/


